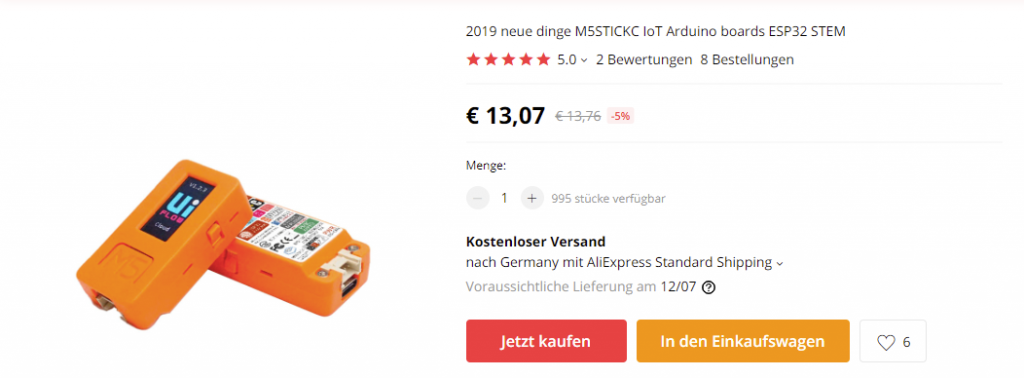
Nach meinem M5StickC Umbau habe ich mir noch einen weiteren M5StickC bestellt und erhalten. Diese mal wollte ich mich mal intensiver mit dem eingebauten MPU6886 Chip beschäftigen.
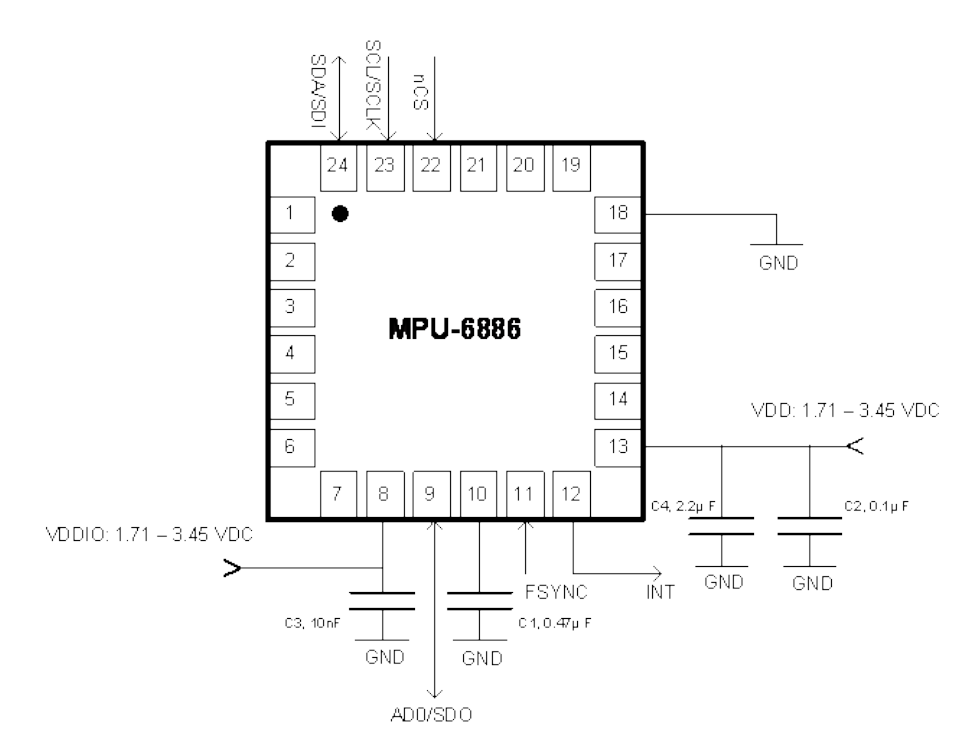
Bei dem MPU6886 Chip handelt es sich um einen 6-Achsen-Sensor. Dabei teilen sich die 6-Achsen auf zu einem 3-Achsen Beschleunigungssensor und einem 3-Achsen Gyro Sensor.
Das Gyroskop verfügt über eine programmierbare FSR ( Full-Scale Range = Vollaussteuerung) von ±250 dps, ±500 dps, ±1000 dps oder ±2000 dps. Laut Spezifikation verfügt der Gyro-Sensor des MPU6886 über eine Auflösung von 16 Bit mit einem Empfindlichkeit von ±1% und einem Rauschen von ±4 mdps/√Hz.
Der 3-Achsen Beschleunigungssensor verfügt über eine programmierbare FSR von ±2g, ±4g, ±8g oder ±16g mit einem Rauchen von 100 µg/√Hz.
Darüber hinaus gibt es noch weitere Funktionen, wie z.B. programmierbare Interrupts, Temperatursensor, Wake-on-Motion, FIFO Buffer, etc.
Der Sensor selbst kommt in einem 3 mm x 3 mm x 0.75 mm 24-pin LGA-System (Land Grid Array) das zum Glück fertig verlötet ist :-).

Das vollständige Datenblatt zum MPU6886 kann unter https://raw.githubusercontent.com/m5stack/M5-Schematic/master/datasheet/MPU-6886-000193%2Bv1.1_GHIC.PDF.pdf heruntergeladen werden.
Los geht’s mit der Programmierung
Die Programmierung des ESP32 im M5StickC in der Arduino IDE ist denkbar einfach. Es muss nur die Datei
#include <M5StickC.h>inkludiert werden und schon hat man alles was man benötigt. Alle Funktionen zur Verwendung des MPU6886 sind enthalten und mit 3 Zeilen code in der setup Funktion kann man dem Sensor schon seine Messwerte entlocken.
void setup()
{
  ...
  M5.MPU6886.Init();
  M5.MPU6886.SetGyroFsr(M5.MPU6886.GFS_500DPS);
  M5.MPU6886.SetAccelFsr(M5.MPU6886.AFS_4G);
  ...
}
Mögliche Werte für die Initialisierung der beiden Sensoren sind:
3-Achsen Beschleunigungssensor
- M5.MPU6886.AFS_2G
- M5.MPU6886.AFS_4G
- M5.MPU6886.AFS_8G
- M5.MPU6886.AFS_16G
3-Achsen Gyro Sensor
- M5.MPU6886.GFS_250DPS
- M5.MPU6886.GFS_500DPS
- M5.MPU6886.GFS_1000DPS
- M5.MPU6886.GFS_2000DPS
Das vollständige Header File findet man unter https://github.com/m5stack/M5StickC/blob/master/src/utility/MPU6886.h
Der main loop
Im main-loop kann man dann mit den Funktionen
void loop {
  ...
  M5.MPU6886.getGyroData(&gyroX, &gyroY, &gyroZ);
  M5.MPU6886.getAccelData(&accX, &accY, &accZ);
  ..
}
die Daten ermitteln. Die Variablen gyroX, gyroY, gyroZ, accX, accY, accZ sind vom Typ float und können z.B. als globale Variablen definiert werden.
Auch wenn der MPU6886 intern über programmierbare digitale Filter verfügt, hat es mich doch gereizt, mal einen Kalman Filter zu realisieren und Werte des Filters mit den Rohdaten des Sensors zu vergleichen. Glücklicherweise habe ich schnell eine geeignete Kalman-Filter Bibliothek gefunden und musste mich nicht selbst mit den mathematischen Grundlagen befassen. Für die Visualisierung der Daten habe ich einfach eine Wasserwaage auf dem Display angezeigt, die sowohl die Rohdaten als auch die gefilterten Daten anzeigt.
Die fertige Lösung
Der komplette C-Code sieht dann wie folgt aus:
#include <M5StickC.h>
#include <Kalman.h>

#define RESTRICT_PITCH // Comment out to restrict roll to ±90deg instead - please read: http://www.freescale.com/files/sensors/doc/app_note/AN3461.pdf

float accX = 0;
float accY = 0;
float accZ = 0;

float gyroX = 0;
float gyroY = 0;
float gyroZ = 0;

float accOffsetX = 0;
float accOffsetY = 0;
float accOffsetZ = 0;

float gyroOffsetX = 11;
float gyroOffsetY = 0;
float gyroOffsetZ = 0;

#define USE_CALIBRATION
float calibrationX = 10;
float calibrationY = -5.6;

float lowPassFilter = 0.01; // depends to delay in loop and max frequency

float lowPassGyroX = 0;
float lowPassGyroY = 0;
float lowPassGyroZ = 0;

uint32_t timer;
double dt;

Kalman kalmanX;
Kalman kalmanY;

double gyroXangle, gyroYangle; // Angle calculate using the gyro only
double compAngleX, compAngleY; // Calculated angle using a complementary filter
double kalAngleX, kalAngleY; // Calculated angle using a Kalman filter

Servo servo;
int servoPin = 26;
int servoValue = 0;

void setup() {
  // put your setup code here, to run once:
  M5.begin();
  M5.Lcd.setRotation(1);
  M5.Lcd.fillScreen(BLACK);
  M5.Lcd.setTextSize(1);
  M5.MPU6886.Init();
  M5.MPU6886.SetGyroFsr(M5.MPU6886.GFS_500DPS);
  M5.MPU6886.SetAccelFsr(M5.MPU6886.AFS_4G);
  pinMode(M5_BUTTON_HOME, INPUT);

  servo.setPeriodHertz(50);// Standard 50hz servo
  servo.attach(servoPin, 500, 2200);
  // using SG90 servo min/max of 500us and 2400us
  // for MG995 large servo, use 1000us and 2000us,
  // which are the defaults, so this line could be
  delay(100); // Wait for sensor to stabilize
  timer = micros();
}

void applyOffset() {
  accX = accX + accOffsetX;
  accY = accY + accOffsetY;
  accZ = accZ + accOffsetZ;

  gyroX = gyroX + gyroOffsetX;
  gyroY = gyroY + gyroOffsetY;
  gyroZ = gyroZ + gyroOffsetZ;
}

void applyLowPass () {
  lowPassGyroX = (lowPassFilter*gyroX) + ((1-lowPassFilter)*lowPassGyroX);
  lowPassGyroY = (lowPassFilter*gyroY) + ((1-lowPassFilter)*lowPassGyroY);
  lowPassGyroZ = (lowPassFilter*gyroZ) + ((1-lowPassFilter)*lowPassGyroZ);
}

void executeKalmanFilter ()
{
  #ifdef RESTRICT_PITCH // Eq. 25 and 26
    double roll  = atan2(accY, accZ) * RAD_TO_DEG;
    double pitch = atan(-accX / sqrt(accY * accY + accZ * accZ)) * RAD_TO_DEG;
  #else // Eq. 28 and 29
    double roll  = atan(accY / sqrt(accX * accX + accZ * accZ)) * RAD_TO_DEG;
    double pitch = atan2(-accX, accZ) * RAD_TO_DEG;
  #endif

  double gyroXrate = gyroX / 131.0; // Convert to deg/s
  double gyroYrate = gyroY / 131.0; // Convert to deg/s
  double gyroZrate = gyroZ / 131.0; // Convert to deg/s

  #ifdef RESTRICT_PITCH // This fixes the transition problem when the accelerometer angle jumps between -180 and 180 degrees
    if ((roll < -90 && kalAngleX > 90) || (roll > 90 && kalAngleX < -90))
    {
      kalmanX.setAngle(roll);
      compAngleX = roll;
      kalAngleX = roll;
      gyroXangle = roll;
    } else {
      kalAngleX = kalmanX.getAngle(roll, gyroXrate, dt); // Calculate the angle using a Kalman filter
    }

    if (abs(kalAngleX) > 90) {
      gyroYrate = -gyroYrate; // Invert rate, so it fits the restriced accelerometer reading
    }

    kalAngleY = kalmanY.getAngle(pitch, gyroYrate, dt);
  #else
    // This fixes the transition problem when the accelerometer angle jumps between -180 and 180 degrees
    if ((pitch < -90 && kalAngleY > 90) || (pitch > 90 && kalAngleY < -90))
    {
      kalmanY.setAngle(pitch);
      compAngleY = pitch;
      kalAngleY = pitch;
      gyroYangle = pitch;
    } else {
      kalAngleY = kalmanY.getAngle(pitch, gyroYrate, dt); // Calculate the angle using a Kalman filter
    }

    if (abs(kalAngleY) > 90)
    {
      gyroXrate = -gyroXrate; // Invert rate, so it fits the restriced accelerometer reading
    }

    kalAngleX = kalmanX.getAngle(roll, gyroXrate, dt); // Calculate the angle using a Kalman filter
  #endif

  compAngleX = 0.93 * (compAngleX + gyroXrate * dt) + 0.07 * roll; // Calculate the angle using a Complimentary filter
  compAngleY = 0.93 * (compAngleY + gyroYrate * dt) + 0.07 * pitch;

  // Reset the gyro angle when it has drifted too much
  if (gyroXangle < -180 || gyroXangle > 180)
  {
      gyroXangle = kalAngleX;
  }

  if (gyroYangle < -180 || gyroYangle > 180)
  {
    gyroYangle = kalAngleY;
  }
}

void showGyros(float x, float y, float z, float accX, float accY, float accZ)
{
  M5.Lcd.setCursor(0, 10);
  M5.Lcd.printf("%7.2f %7.2f", x, accX);
  M5.Lcd.setCursor(0, 30);
  M5.Lcd.printf("%7.2f %7.2f", y, accY);
  M5.Lcd.setCursor(0, 50);
  M5.Lcd.printf("%7.2f %7.2f", z, accZ);
}


void showKlamanValues()
{
  M5.Lcd.setCursor(0, 10);
  M5.Lcd.printf("%7.2f %7.2f", gyroXangle, gyroYangle);
  M5.Lcd.setCursor(0, 30);
  M5.Lcd.printf("%7.2f %7.2f", compAngleX, compAngleY);
  M5.Lcd.setCursor(0, 50);
  M5.Lcd.printf("%7.2f %7.2f", kalAngleX,  kalAngleY);
}

int bubblex1 = 0;
int bubbley1 = 0;
int bubblex2 = 0;
int bubbley2 = 0;

void drawBubbleLevel()
{
  int color0 = 0x0000;
  int color1 = 0x3a59;
  int color2 = 0xe8e4;
  int color3 = 0x2589;
  int cx = 80;
  int cy = 40;
  M5.Lcd.fillCircle(bubblex1,bubbley1,2, color0);
  M5.Lcd.fillCircle(bubblex2,bubbley2,2, color0);
  M5.Lcd.drawCircle(cx,cy,59, color1);
  M5.Lcd.drawCircle(cx,cy,39, color1);
  M5.Lcd.drawCircle(cx,cy,19, color1);
  M5.Lcd.drawCircle(cx,cy,9, color1);
  #ifdef USE_CALIBRATION
    bubblex1 = cx - compAngleX * 10 + calibrationX;
    bubbley1 = cy + compAngleY * 10 + calibrationY;
    bubblex2 = cx - kalAngleX * 10 + calibrationX;
    bubbley2 = cy + kalAngleY * 10 + calibrationY;
  #else
    bubblex1 = cx - compAngleX;
    bubbley1 = cy + compAngleY;
    bubblex2 = cx - kalAngleX;
    bubbley2 = cy + kalAngleY;
  #endif
  M5.Lcd.fillCircle(bubblex1,bubbley1,2, color2);
  M5.Lcd.fillCircle(bubblex2,bubbley2,2, color3);
}

void plotKalmanData()
{
  Serial.print(gyroXangle);
  Serial.print(",");
  Serial.print(gyroYangle);
  Serial.print(",");
  Serial.print(compAngleX);
  Serial.print(",");
  Serial.print(compAngleY);
  Serial.print(",");
  Serial.print(kalAngleX);
  Serial.print(",");
  Serial.print(kalAngleY);
  Serial.println("");
}

void loop() {
  dt = (double)(micros() - timer) / 1000000; // Calculate delta time
  timer = micros();

  // put your main code here, to run repeatedly:
  M5.MPU6886.getGyroData(&gyroX, &gyroY, &gyroZ);
  M5.MPU6886.getAccelData(&accX, &accY, &accZ);

  executeKalmanFilter();
  drawBubbleLevel();
  plotKalmanData();

}
Das fertige Programm kann unter https://github.com/msoftware/M5StickC-Wasserwaage/blob/master/M5StickC_Wasserwaage/M5StickC_Wasserwaage.ino heruntergeladen werden. Neben der fertigen Wasserwaage enthält der Code auch noch ein paar Reste eines Tiefpass-Filters und anderer Experimente mit denen ich mich evtl. später noch einmal beschäftigen werde. Updates und Erweiterungen werden auch nur unter github.com veröffentlicht, daher lohnt es sich nicht, den Code aus dem Blog-Post zu kopieren.
Demo Time
Fazit
Alles in allem kann man sagen, dass der MPU 6886 ein solider Sensor ist. Als fertige Einheit mit ESP32-Mikrocontroller, Akku, Gehäuse, WiFi und Bluetooth kann man damit sicher eine ganze menge lustiger Sachen anstellen. Für 13€ bekommt man hier schon einem Menge geboten, auch wenn die Probleme mit dem Akku (wie unter https://jentsch.io/m5stickc-umbau/ beschrieben) etwas unschön sind.

