Vor einiger Zeit bin ich das erste mal auf https://letsencrypt.org/ aufmerksam geworden und habe es leider bisher nicht geschafft, mich an dem Beta Programm zu Beteiligen. Doch seit heute ist Let’s Encrypt in einer Public Beta Phase und das heißt, jeder Webmaster kann seinen Webserver kostenlos mit einem Zertifikat versehen und damit die Kommunikation zwischen Browser und Server absichern.
Let’s Encrypt Zertifikate sind mit allen gängigen Browsern kompatibel. Die kostenlosen Let’s Encrypt-Zertifikate werden von allen aktuellen Webbrowsern als vertrauenswürdig eingestuft. Durch die Verwendung der Zertifikate wird die Übertragung sensibler Informationen wie Kreditkartendaten, Bankverbindungen, Passwörter und andere vertrauliche Daten verschlüsselt. Zusätzlich gibt es noch einen kleinen Bonus von Google, da der Algorithmus von Google seit ca. einem Jahr SSL / HTTPS als Ranking Faktor berücksichtigt.
Let’s Encrypt Selbst-test
Das Warten auf die Public Beta Phase hat ein Ende. Was liegt also näher, ein Zertifikat zu erstellen und meinen Server auf https umzustellen.
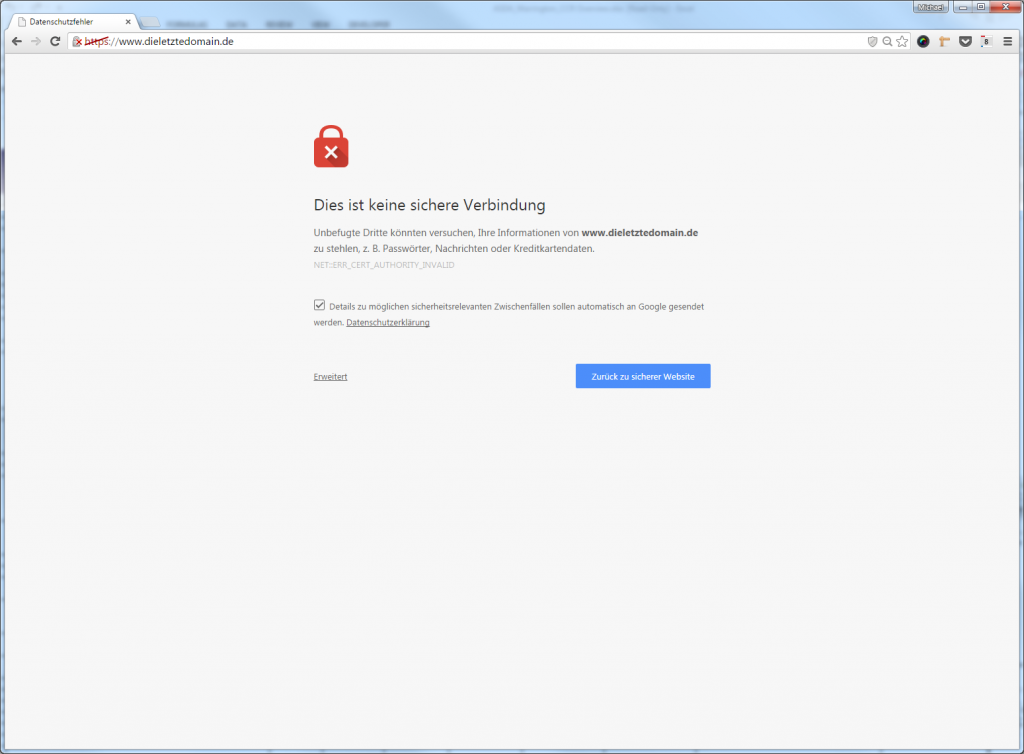
Bevor ich anfange sehe ich mir erst mal meine Webseite im Browser an. Bisher habe ich noch kein https Zertifikat eingerichtet. Im Browser sehe ich das folgende:
Genau wie ich es erwartet habe. Der Port 443 ist zwar offen, aber der Browser merkt, da stimmt doch was nicht und mit Sicherheit ist die Verbindung nicht sicher. Das ist es ja, was ich ändern möchte.
Als erstes installiere ich mir das kleine Tool von Let’s Encrypt mit dem man die HTTPS-Zertifikate erstellen kann. Einfach ein Terminal öffnen und mit user@webserver:~$ git clone https://github.com/letsencrypt/letsencrypt das Projekt aus dem GitHum Repository klonen.
Im Unterverzeichnis letsencrypt kann man nun mit ./letsencrypt-auto –help all die Hilfe des Let’s Encrypt Clients anzeigen und das sieht dann wie folgt aus:
Updating letsencrypt and virtual environment dependencies.......
Running with virtualenv: /root/.local/share/letsencrypt/bin/letsencrypt --help all
usage:
  letsencrypt [SUBCOMMAND] [options] [-d domain] [-d domain] ...

The Let's Encrypt agent can obtain and install HTTPS/TLS/SSL certificates.  By
default, it will attempt to use a webserver both for obtaining and installing
the cert. Major SUBCOMMANDS are:

  (default) run        Obtain & install a cert in your current webserver
  certonly             Obtain cert, but do not install it (aka "auth")
  install              Install a previously obtained cert in a server
  revoke               Revoke a previously obtained certificate
  rollback             Rollback server configuration changes made during install
  config_changes       Show changes made to server config during installation
  plugins              Display information about installed plugins

optional arguments:
  -h, --help            show this help message and exit
  -c CONFIG_FILE, --config CONFIG_FILE
                        config file path (default: None)
  -v, --verbose         This flag can be used multiple times to incrementally
                        increase the verbosity of output, e.g. -vvv. (default:
                        -3)
  -t, --text            Use the text output instead of the curses UI.
                        (default: False)
  --register-unsafely-without-email
                        Specifying this flag enables registering an account
                        with no email address. This is strongly discouraged,
                        because in the event of key loss or account compromise
                        you will irrevocably lose access to your account. You
                        will also be unable to receive notice about impending
                        expiration of revocation of your certificates. Updates
                        to the Subscriber Agreement will still affect you, and
                        will be effective 14 days after posting an update to
                        the web site. (default: False)
  -m EMAIL, --email EMAIL
                        Email used for registration and recovery contact.
                        (default: None)
  -d DOMAIN, --domains DOMAIN, --domain DOMAIN
                        Domain names to apply. For multiple domains you can
                        use multiple -d flags or enter a comma separated list
                        of domains as a parameter. (default: [])
  --duplicate           Allow getting a certificate that duplicates an
                        existing one (default: False)
  --user-agent USER_AGENT
                        Set a custom user agent string for the client. User
                        agent strings allow the CA to collect high level
                        statistics about success rates by OS and plugin. If
                        you wish to hide your server OS version from the Let's
                        Encrypt server, set this to "". (default: None)

automation:
  Arguments for automating execution & other tweaks

  --version             show program's version number and exit
  --renew-by-default    Select renewal by default when domains are a superset
                        of a previously attained cert (default: False)
  --agree-tos           Agree to the Let's Encrypt Subscriber Agreement
                        (default: False)
  --account ACCOUNT_ID  Account ID to use (default: None)

testing:
  The following flags are meant for testing purposes only! Do NOT change
  them, unless you really know what you're doing!

  --debug               Show tracebacks in case of errors, and allow
                        letsencrypt-auto execution on experimental platforms
                        (default: False)
  --no-verify-ssl       Disable SSL certificate verification. (default: False)
  --tls-sni-01-port TLS_SNI_01_PORT
                        Port number to perform tls-sni-01 challenge. Boulder
                        in testing mode defaults to 5001. (default: 443)
  --http-01-port HTTP01_PORT
                        Port used in the SimpleHttp challenge. (default: 80)

security:
  Security parameters & server settings

  --rsa-key-size N      Size of the RSA key. (default: 2048)
  --redirect            Automatically redirect all HTTP traffic to HTTPS for
                        the newly authenticated vhost. (default: None)
  --no-redirect         Do not automatically redirect all HTTP traffic to
                        HTTPS for the newly authenticated vhost. (default:
                        None)
  --hsts                Add the Strict-Transport-Security header to every HTTP
                        response. Forcing browser to use always use SSL for
                        the domain. Defends against SSL Stripping. (default:
                        False)
  --no-hsts             Do not automatically add the Strict-Transport-Security
                        header to every HTTP response. (default: False)
  --uir                 Add the "Content-Security-Policy: upgrade-insecure-
                        requests" header to every HTTP response. Forcing the
                        browser to use https:// for every http:// resource.
                        (default: None)
  --no-uir              Do not automatically set the "Content-Security-Policy:
                        upgrade-insecure-requests" header to every HTTP
                        response. (default: None)
  --strict-permissions  Require that all configuration files are owned by the
                        current user; only needed if your config is somewhere
                        unsafe like /tmp/ (default: False)

certonly:
  Options for modifying how a cert is obtained

  --csr CSR             Path to a Certificate Signing Request (CSR) in DER
                        format; note that the .csr file *must* contain a
                        Subject Alternative Name field for each domain you
                        want certified. (default: None)

install:
  Options for modifying how a cert is deployed

revoke:
  Options for revocation of certs

rollback:
  Options for reverting config changes

  --checkpoints N       Revert configuration N number of checkpoints.
                        (default: 1)

plugins:
  Plugin options

  --init                Initialize plugins. (default: False)
  --prepare             Initialize and prepare plugins. (default: False)
  --authenticators      Limit to authenticator plugins only. (default: None)
  --installers          Limit to installer plugins only. (default: None)

paths:
  Arguments changing execution paths & servers

  --cert-path CERT_PATH
                        Path to where cert is saved (with auth --csr),
                        installed from or revoked. (default: None)
  --key-path KEY_PATH   Path to private key for cert installation or
                        revocation (if account key is missing) (default: None)
  --fullchain-path FULLCHAIN_PATH
                        Accompanying path to a full certificate chain (cert
                        plus chain). (default: None)
  --chain-path CHAIN_PATH
                        Accompanying path to a certificate chain. (default:
                        None)
  --config-dir CONFIG_DIR
                        Configuration directory. (default: /etc/letsencrypt)
  --work-dir WORK_DIR   Working directory. (default: /var/lib/letsencrypt)
  --logs-dir LOGS_DIR   Logs directory. (default: /var/log/letsencrypt)
  --server SERVER       ACME Directory Resource URI. (default:
                        https://acme-v01.api.letsencrypt.org/directory)

plugins:
  Let's Encrypt client supports an extensible plugins architecture. See
  'letsencrypt plugins' for a list of all installed plugins and their names.
  You can force a particular plugin by setting options provided below.
  Further down this help message you will find plugin-specific options
  (prefixed by --{plugin_name}).

  -a AUTHENTICATOR, --authenticator AUTHENTICATOR
                        Authenticator plugin name. (default: None)
  -i INSTALLER, --installer INSTALLER
                        Installer plugin name (also used to find domains).
                        (default: None)
  --configurator CONFIGURATOR
                        Name of the plugin that is both an authenticator and
                        an installer. Should not be used together with
                        --authenticator or --installer. (default: None)
  --apache              Obtain and install certs using Apache (default: False)
  --nginx               Obtain and install certs using Nginx (default: False)
  --standalone          Obtain certs using a "standalone" webserver. (default:
                        False)
  --manual              Provide laborious manual instructions for obtaining a
                        cert (default: False)
  --webroot             Obtain certs by placing files in a webroot directory.
                        (default: False)

apache:
  Apache Web Server - Alpha

  --apache-ctl APACHE_CTL
                        Path to the 'apache2ctl' binary, used for
                        'configtest', retrieving the Apache2 version number,
                        and initialization parameters. (default: apache2ctl)
  --apache-enmod APACHE_ENMOD
                        Path to the Apache 'a2enmod' binary. (default:
                        a2enmod)
  --apache-dismod APACHE_DISMOD
                        Path to the Apache 'a2enmod' binary. (default:
                        a2dismod)
  --apache-le-vhost-ext APACHE_LE_VHOST_EXT
                        SSL vhost configuration extension. (default: -le-
                        ssl.conf)
  --apache-server-root APACHE_SERVER_ROOT
                        Apache server root directory. (default: /etc/apache2)

webroot:
  Webroot Authenticator

  -w WEBROOT_PATH, --webroot-path WEBROOT_PATH
                        public_html / webroot path. This can be specified
                        multiple times to handle different domains; each
                        domain will have the webroot path that preceded it.
                        For instance: `-w /var/www/example -d example.com -d
                        www.example.com -w /var/www/thing -d thing.net -d
                        m.thing.net` (default: None)

null:
  Null Installer

manual:
  Manually configure an HTTP server

  --manual-test-mode    Test mode. Executes the manual command in subprocess.
                        (default: False)
  --manual-public-ip-logging-ok
                        Automatically allows public IP logging. (default:
                        False)

standalone:
  Automatically use a temporary webserver

  --standalone-supported-challenges STANDALONE_SUPPORTED_CHALLENGES
                        Supported challenges, order preferences are randomly
                        chosen. (default: http-01,tls-sni-01)
So weit so gut. Laut der Doku kann man nun mit dem Befehl …
./letsencrypt-auto --apache -d jentsch.io -d www.jentsch.io
… alles weitere erledigen. Das funktioniert bei mir natürlich erst mal nicht und ich erhalte folgende Fehlermeldung:
Updating letsencrypt and virtual environment dependencies.......
Running with virtualenv: /root/.local/share/letsencrypt/bin/letsencrypt --apache -d jentsch.io -d www.jentsch.io
The apache plugin is not working; there may be problems with your existing configuration.
The error was: NoInstallationError()
Das ist aber auch kein Wunder, da ich keine Standard Apache Installation habe und bei mir alles anders ist :-). Nun habe ich 2 Möglichkeiten.
1. Das Let’s Encrypt Apache Plugin so weit anzupassen, dass es mit meiner Installation fertig wird
oder …
2. Das Zertifikat mit dem Let’s Encrypt Client manuell erstellen und installieren.
Ich entscheide mich recht spontan für die zweite Möglichkeit und erstelle mir erst mal ein Zertifikat.
Dazu rufe ich folgenden Befehl auf
./letsencrypt-auto certonly --standalone --email m.jentsch@web.de -d jentsch.io -d www.jentsch.io
Doch schon wieder gibt es ein Problem.

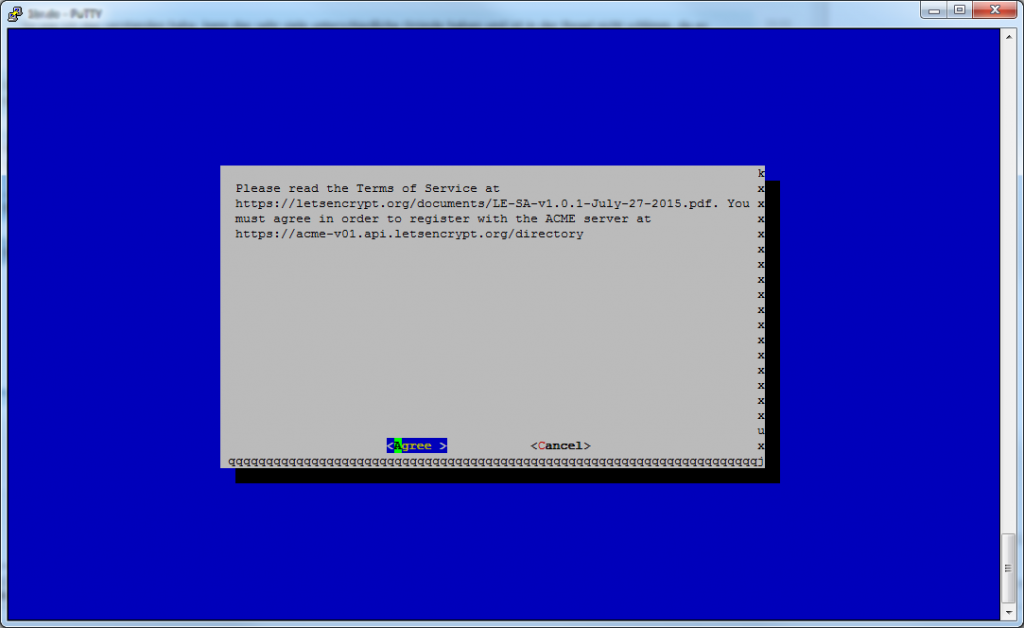
Ganz offensichtlich versucht Let’s Encrypt einen Server auf dem Port 80 zu starten. Also muss ich meinen Apache mal für ein paar Minuten stoppen. Nach einem weiteren Versuch werde ich dann mit einem weiteren Hinweis darauf aufmerksam gemacht, dass ich doch bitte den Bedinungnen in dem Dokument unter https://letsencrypt.org/documents/LE-SA-v1.0.1-July-27-2015.pdf zustimmen soll.

Also gut. Ich klicke auf „agree“ und nach ein paar Sekunden erhalte ich folgenden Hinweis:
Updating letsencrypt and virtual environment dependencies.......
Running with virtualenv: /.../letsencrypt certonly --standalone --email m.jentsch@web.de -d jentsch.io -d www.jentsch.io

IMPORTANT NOTES:
 - Congratulations! Your certificate and chain have been saved at
   /etc/letsencrypt/live/jentsch.io/fullchain.pem. Your cert
   will expire on 2016-03-03. To obtain a new version of the
   certificate in the future, simply run Let's Encrypt again.
 - If like Let's Encrypt, please consider supporting our work by:

   Donating to ISRG / Let's Encrypt:   https://letsencrypt.org/donate
   Donating to EFF:                    https://eff.org/donate-le
Nun habe ich also was ich brauche. Einmal die cert.pem und die privkey.pem Datei. Nun öffnen ich meine http config datei und trage dort einen neuen VirtualHost auf Port 443 ein. Der Eintrag sieht wie folgt aus:
    SSLEngine on
    SSLCertificateFile /etc/letsencrypt/live/jentsch.io/cert.pem
    SSLCertificateKeyFile /etc/letsencrypt/live/jentsch.io/privkey.pem
    DocumentRoot "/vhosts/jentsch.io"
    ServerName jentsch.io
    ServerAlias www.jentsch.io
    ErrorLog "logs/jentsch.io-error.log"
    CustomLog "logs/jentsch.io-access.log" common
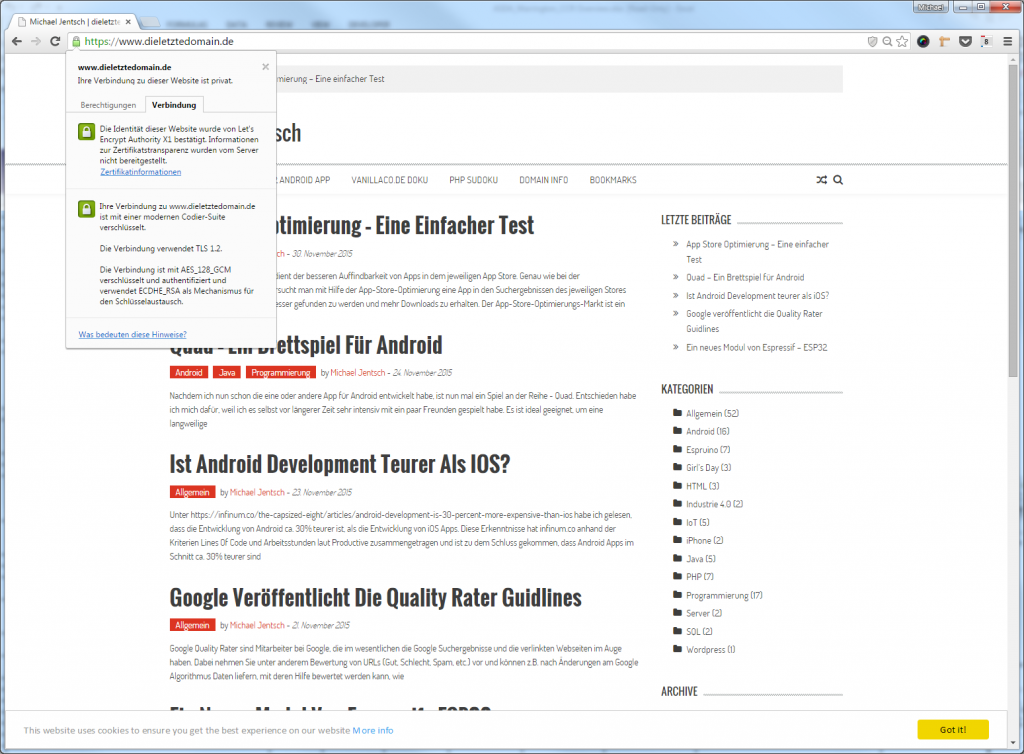
Nach dem Neustart des Apache rufe ich wieder https://www.jentsch.io/ auf und alles hat funktioniert. Das grüne Schloss in der Adressleiste zeigt mir, dass ich mich nun viel sicherer fühlen kann. 🙂

Wie in dem Bild zu sehen ist verwendet die Verbindung TLS 1.2. Grund genug, mal zu googlen was das denn beduetet. Unter https://de.wikipedia.org/wiki/Transport_Layer_Security habe ich dann leider folgendes gefunden.
TLS 1.2 wird in der Standardkonfiguration von Internet Explorer, Firefox, Google Chrome, Opera und Apple iOS Safari verwendet.
TLS ist ohne eine zertifikatsbasierte Authentifizierung anfällig für Man-in-the-Middle-Angriffe: Ist der Man-in-the-Middle vor der Übergabe des Schlüssels aktiv, kann er beiden Seiten seine Schlüssel vorgaukeln und so den gesamten Datenverkehr im Klartext aufzeichnen und unbemerkt manipulieren. Wegen der mangelnden Vertrauenswürdigkeit einiger Zertifizierungsstellen wird seit Anfang 2010 die Sicherheit von TLS grundsätzlich angezweifelt.
Wenn ich mir das durchlese und daran denke, dass unter anderem Facebook und eine Horde anderer Firmen von denen ich vorher noch nie etwas gehört habe als „MAJOR SPONSORS“ angegeben werden, dann habe ich fast das Gefühl, der Aufwand hat sich doch nicht so ganz gelohnt. Naja, nun ist das Zertifikat erst mal da und schlechter werden kann es ja nicht. Also lasse ich es erst mal wie es ist und trage mir den Termin 2016-03-03 in meinem Kalender ein. Das ist der Tag an dem ich mein Zertifikat erneuern muss. Laut Let’s Encrypt muss ich dazu einfach nur wieder den Befehl ./letsencrypt-auto certonly –standalone … aufrufen und alles ist gut. Die Zertifikate werden wieder an der gleichen Stelle abgelegt und der Apache muss nicht mal neu gestartet werden.
…. Wir werden sehen.
Let’s Encrypt jentsch.io – was noch zu tun ist
Hurra, meine Website ist nun abgesichert …. oder nicht? Naja, das kommt ganz darauf an, wie man sie im Browser aufruft. Unter http://www.jentsch.io/ ist noch alles beim alten. Unter https://www.jentsch.io/ ist die Verbindung nun abgesichert. Fehlt also noch eine Weiterleitung von http://www.jentsch.io/ zu https://www.jentsch.io/. Ist die Weiterleitung aktiv, wird ein Besucher automatisch zu https://www.jentsch.io/ weitergeleitet, wenn er http://www.jentsch.io/ aufruft. Diesen letzten Schritt mache ich aber noch nicht. Ich werde erst mal beobachten wie die https Verschlüsselung so funktioniert und dann die Weiterleitung einrichten.
Allerdings trage ich schon mal das https in meine WordPress Konfiguration ein. So dass wenigstens die CMS Links schon mal auf das richtige Protokoll zeigen. Dazu gehe ich in Mein WordPress Einstellungen unter „Einstellungen -> Allgemein“ und ersetze http durch https.
Fazit
Ein kostenloses Zertifikat von Let’s Encrypt ist schnell installiert, selbst wenn man (wie in meinem speziellen Fall) vieles manuell manchen muss. In den meisten Fällen ist die Installation eines Zertifikates wohl viel einfacher und dafür dass dies die Public Beta Phase ist, hat doch alles ganz wunderbar funktioniert.